mods, Technology & Coffee
Temperature Pt. 4: Reading
Mar
Temperature Pt. 4: Reading
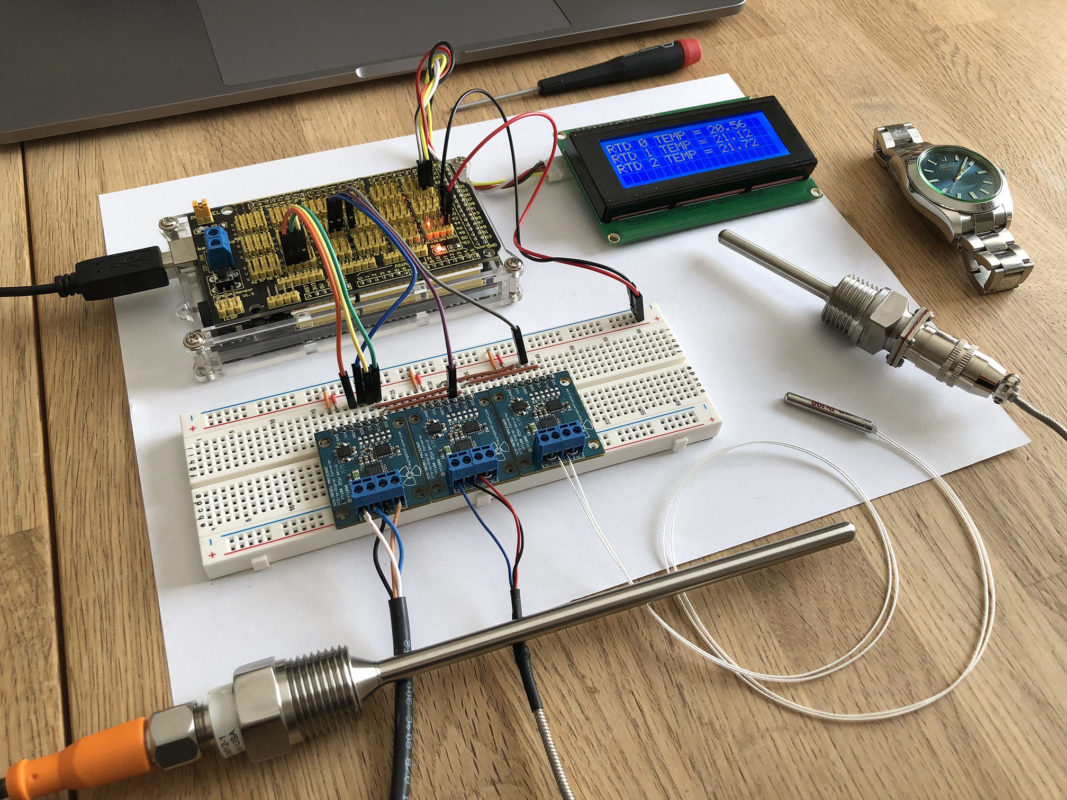
At this point in the process, the hardware for our RTD probe should be assembled and the sketch uploaded to the Arduino. In this section we cover how our 3 channel RTD provides a readout and troubleshoot any problems that may arise.
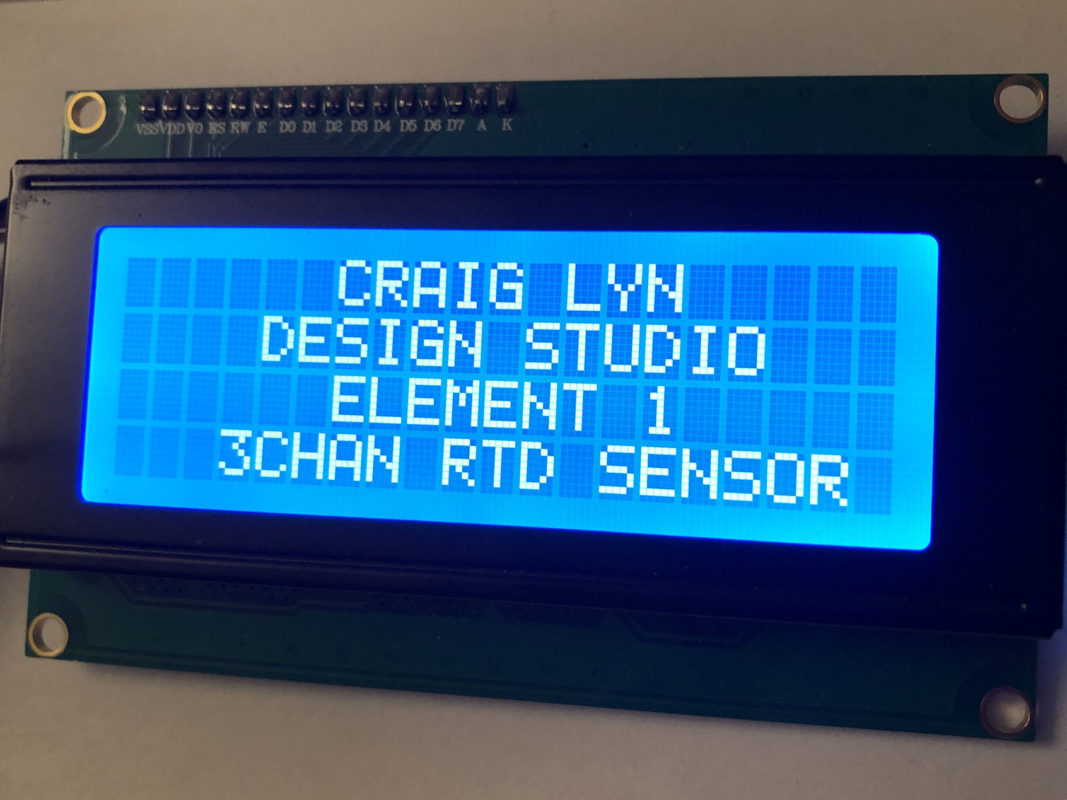
After uploading the sketch for the first time, the Arduino should automatically reboot and display the following text on the LCD.
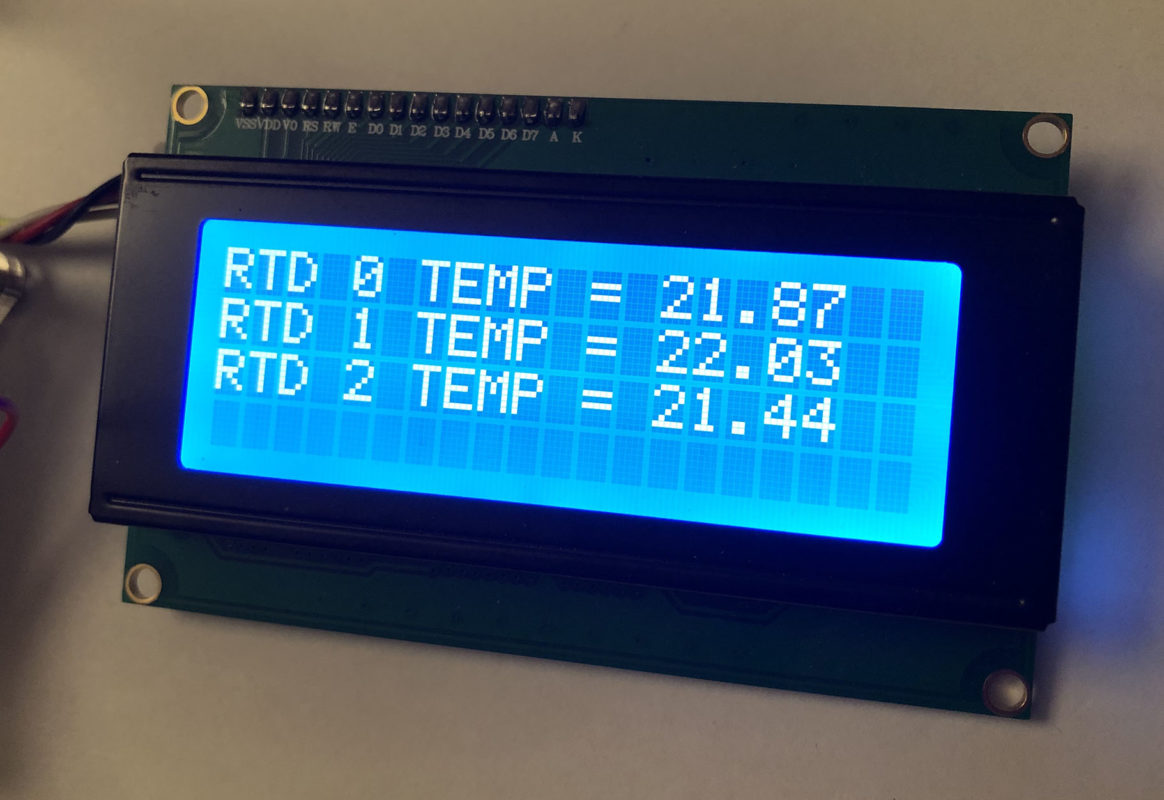
If everything has been connected properly, after several seconds, the readout from the RTDs displaying the temperature from the probes shouldappear.
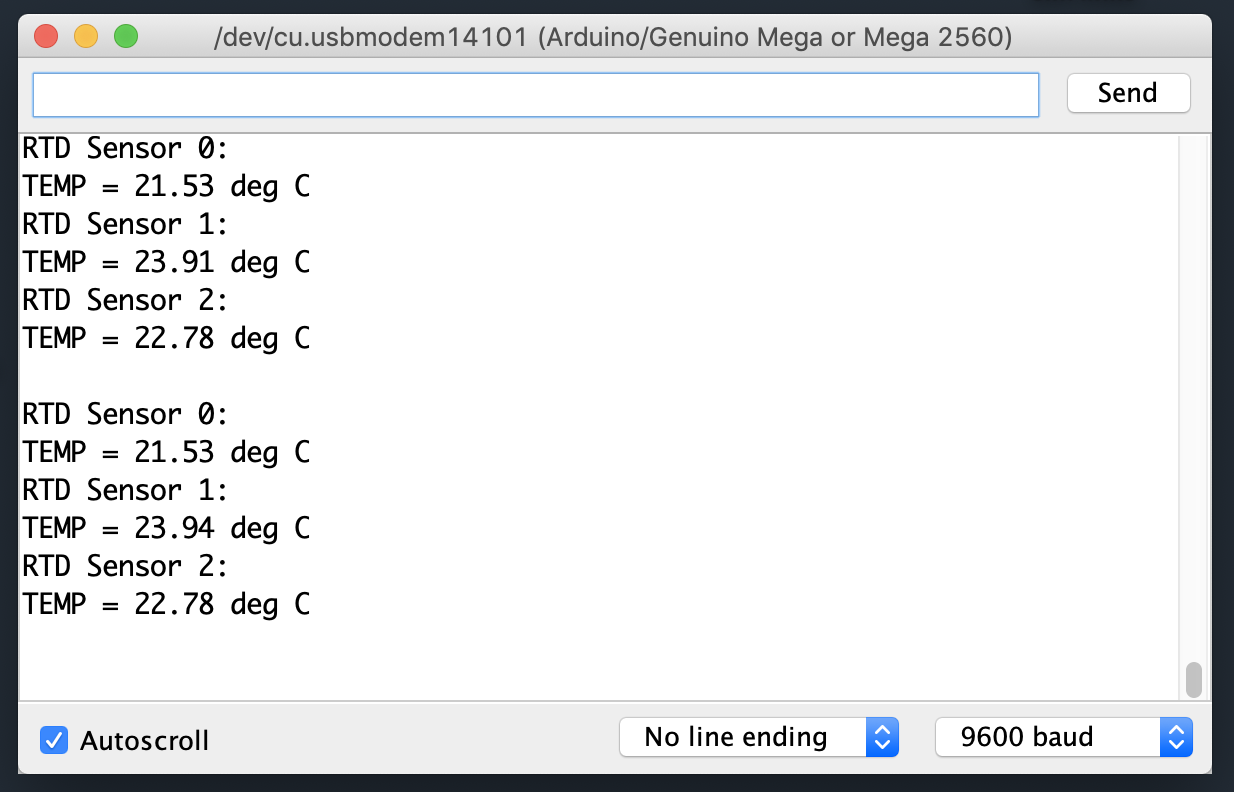
In addition, the same temperature data is also passed along to the Arduino IDE Serial Monitor.
If you’re able to see a temperature readout and the temperature corresponds to what average room temperature then you’re done. It’s time to start experimenting with different types of probes or play around with the code.
Troubleshooting
- Nothing displayed on the LCD
- Go back and follow the LCD Display post then re-upload the RTD sketch
- All 3 RTDs 0 / 1 / 2 displaying FAULT
- Unplug the MEGA
- Check the SPI wiring connections between the breadboard and the Arduino
- Incorrect temperature displayed
- Check to see if the jumpers on the RTD terminals are in the correct order
- Check the RTD spec sheet and that the +/- wires are in the correct terminals