Service HG-1 PRIME Mitre Gears
Our miter gears have been rated for extreme industrial applications and we’re confident that they will last a lifetime in the HG-1 PRIME. The only maintenance required is an occasional cleaning and lubrication.
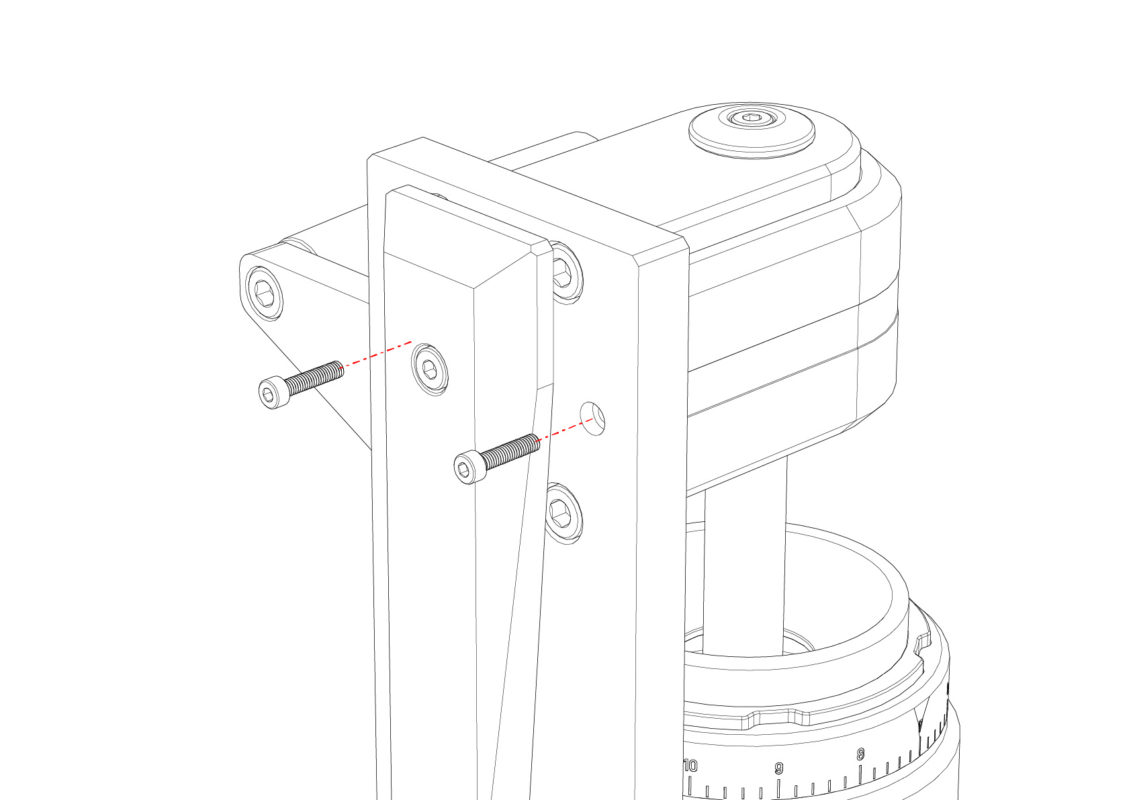
The miter gears are located inside the gearbox and are easily accessible by removing the gearbox cover. Use a 3 mm hex key to remove the screws in the rear of the grinder.
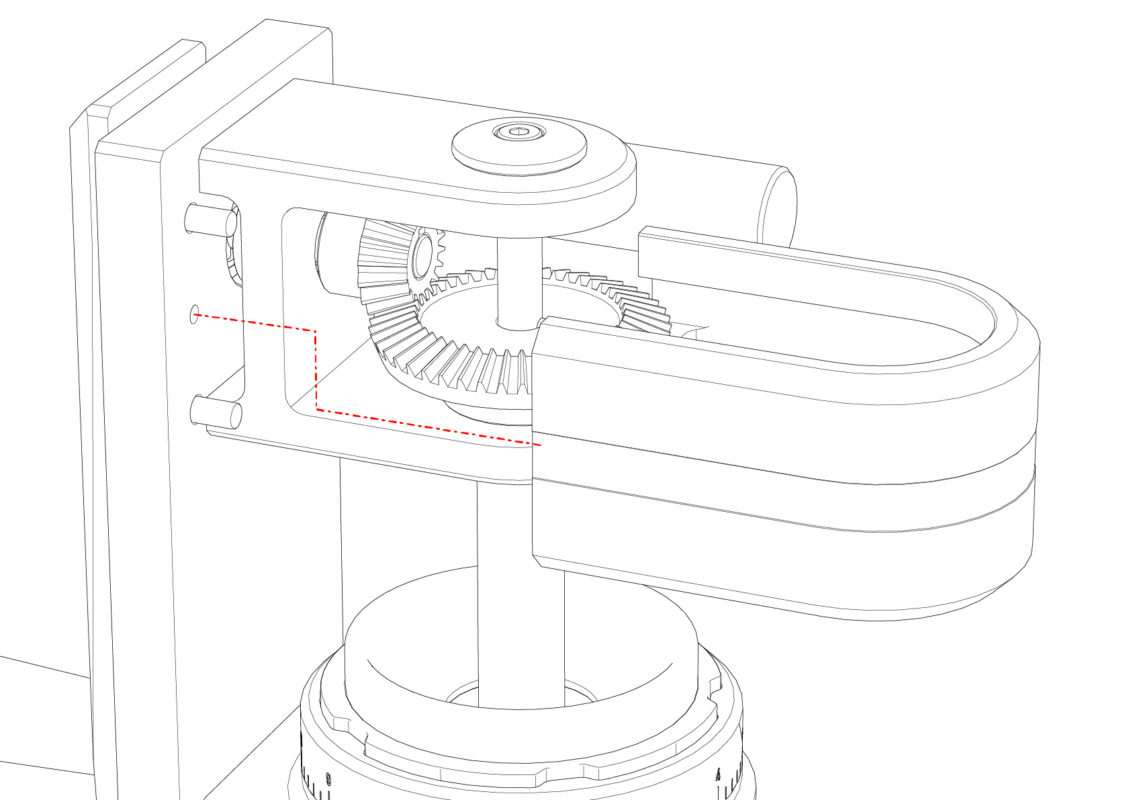
Once the screws have been removed, gently pull the cover off of the back of the grinder. It is held in place with 4 dowel pins. Once the cover is clear of the pins, move the cover downwards and continue to move the cover away from the back of the grinder.
NOTE: Use care when removing the gearbox cover. It can easily fall and dent the grinder.
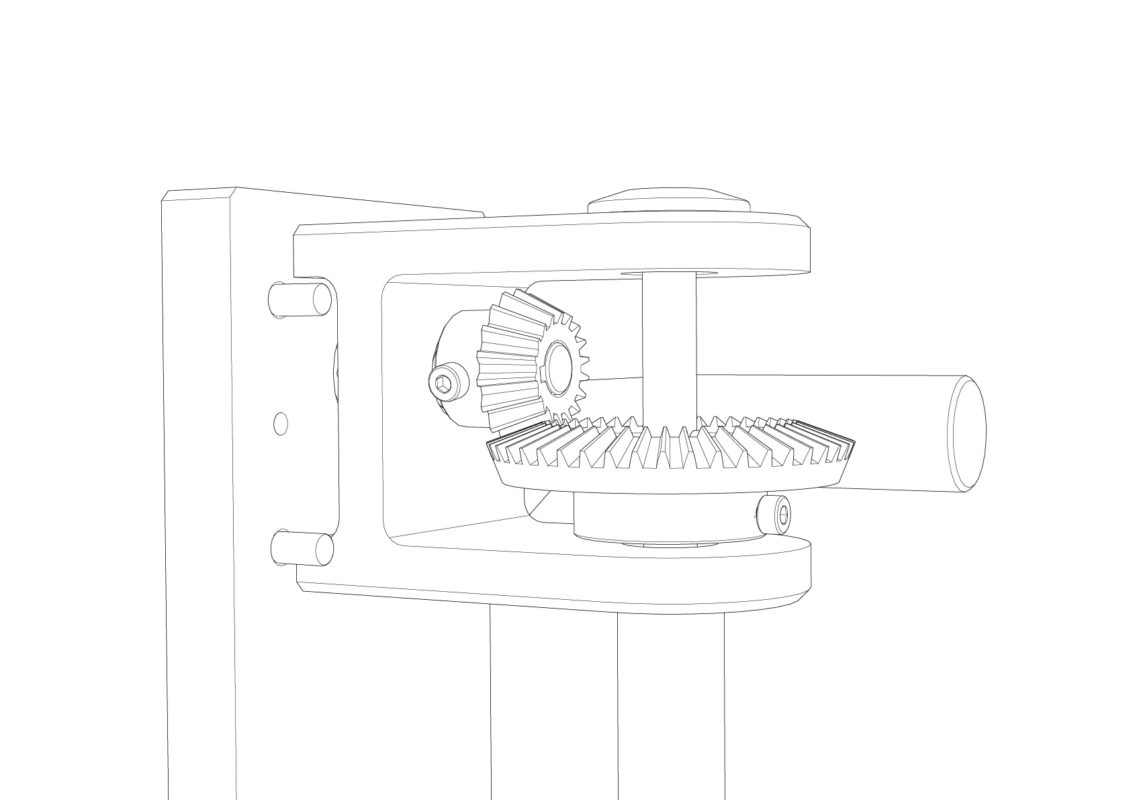
With a clean rag, wipe off any old lubrication remaining on the gears. Slowly turn the lever arm to access all faces of the gear teeth. Be careful not to get your fingers caught in the gears! Once the gears are clean, add a small amount of fresh lubricant to the gears. Once again, slowly turn the flywheel to access all faces of the gear teeth.
Test the gears by giving the lever a slow spin. Replace the panel and screws.
Adjusting the Mitre Gears
Over time there can be some movement of the miter gears. This is normal behavior.
Gear sets have been designed to accommodate movement or play before engaging. This is commonly referred to as backlash. The HG-1 PRIME lever should be able to be turned 1° to 3° before the main shaft begins to move, this is normal behavior.
If you’re hearing an excessive amount of noise from the gearbox above normal the miter gears might need to be adjusted. Please bear in mind, the gear set is hardened steel so a rumbling noise can be considered appropriate.
To adjust the amount of backlash between the gears, first follow the instructions above to open the Gearbox Panel.
Next:
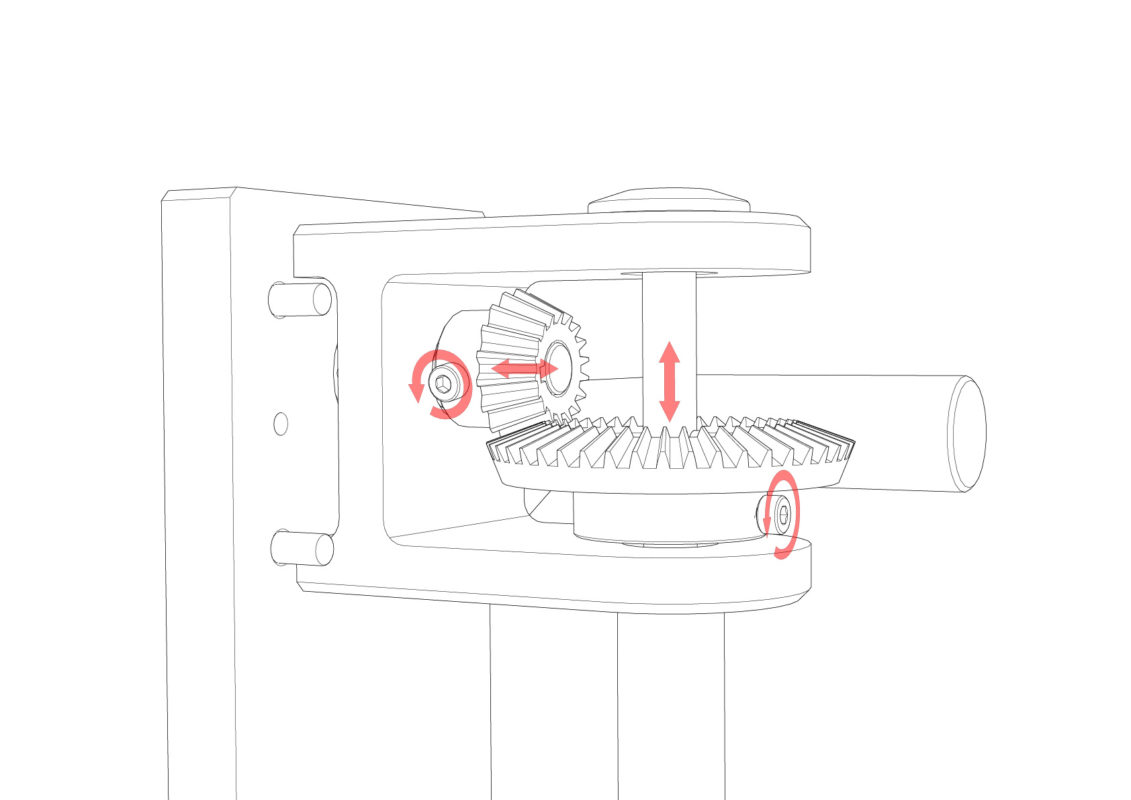
- Using a metric hex key, loosen the set screw(s) holding the miter gear to the shaft.
- If you are adjusting the miter gear attached to the main shaft, move it vertically to adjust the backlash. If you are adjusting the miter gear attached to the lever shaft, move it horizontally to adjust the backlash. Only adjust one gear at at time.
- Moving a gear closer to it’s mate, reduces the amount of backlash. Moving a gear further from it’s mate, increases the amount of backlash. The HG-1 should have between 1° to 3° of backlash to work correctly.
- Tighten the set screws and then rotate the lever to gauge the amount of backlash applied.
- CAUTION: keep your fingers clear of the gears while moving the lever. Serious injury may occur.
- Close the panel when complete.