
HOW TO GRIND
This guide will walk you through grinding your first shot with the HG-1 Prime.
The HG-1 Prime is a single-dose grinder. For consistent results, we recommend weighing your coffee beans before each grind. Keeping your dose consistent eliminates one variable and makes dialing in your espresso considerably easier.
Grinding for espresso takes a little practice. Finding the right setting involves some trial and error, but once you’ve dialed in your grinder, producing consistent results becomes second nature.
FIRST THINGS FIRST
Before getting started, please review our Setup guide. It covers assembly and mounting options to ensure your HG-1 Prime is properly assembled and ready for use. Please read all instructions before use. This applies especially to those who consider instruction manuals, road maps, and recipes entirely optional.
Take your time, especially if this is your first experience with a hand grinder. A little patience and practice will go a long way toward getting the best results.
01 LET THE GRINDS BEGIN
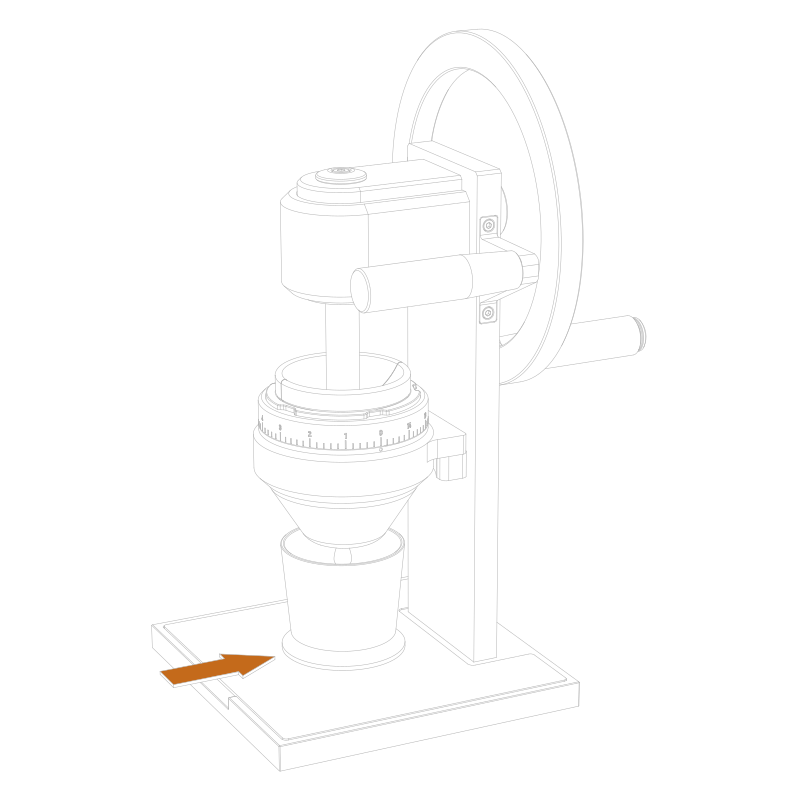
Find a comfortable spot for your HG-1 Prime. At approximately 18 pounds and 16 inches tall, it’s a substantial piece of equipment, so choose a stable, level surface with enough clearance to turn the flywheel comfortably.
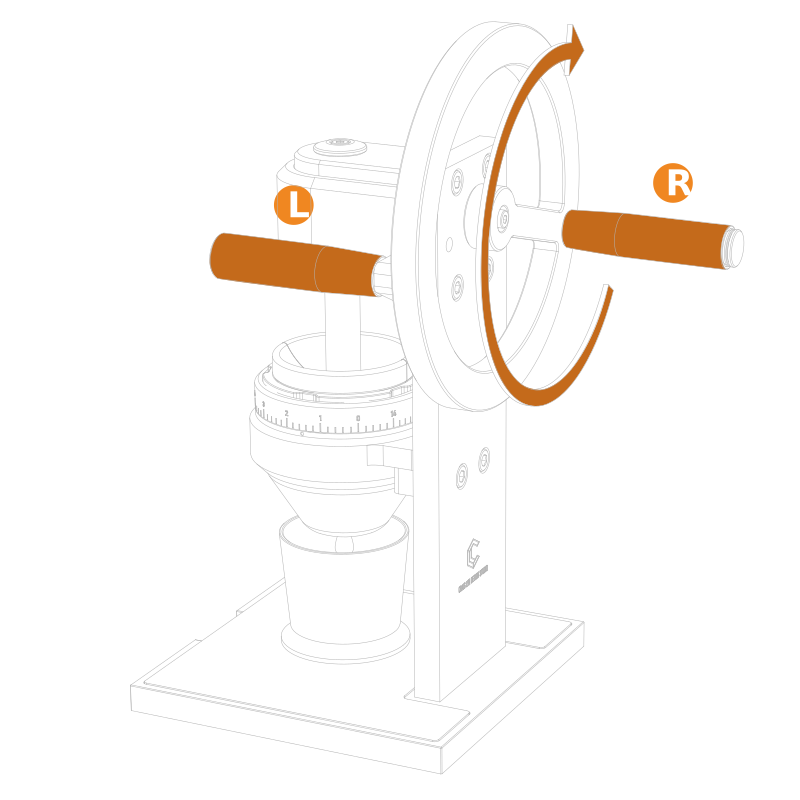
Position the grinder with the grab handle to your left and the flywheel handle to your right.
Finally, slide the Espresso Shaker Funnel into position beneath the grinder, as shown. You’re ready to get started.
02 FREE THE RING
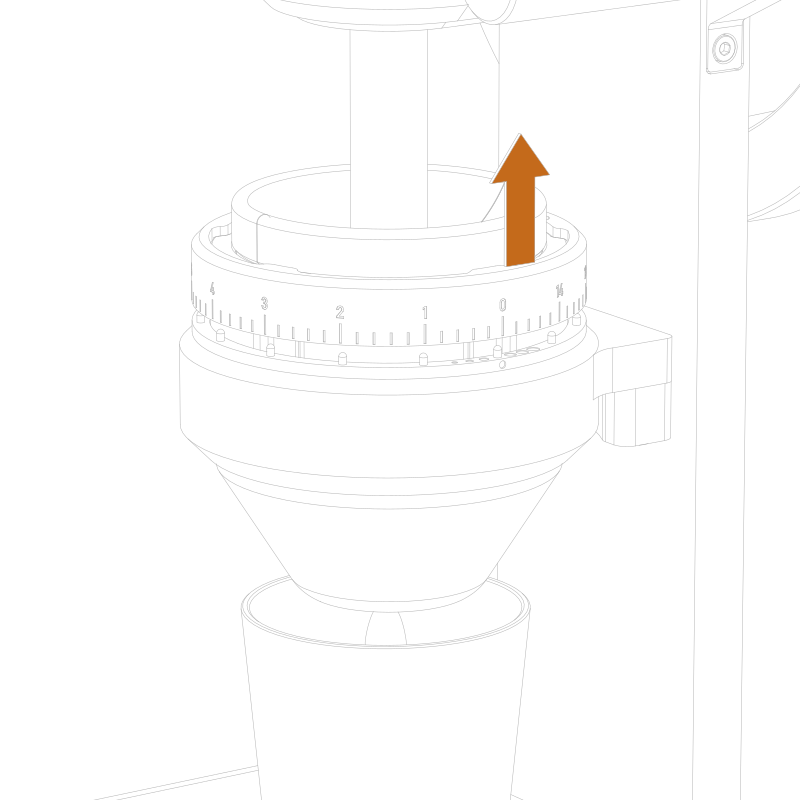
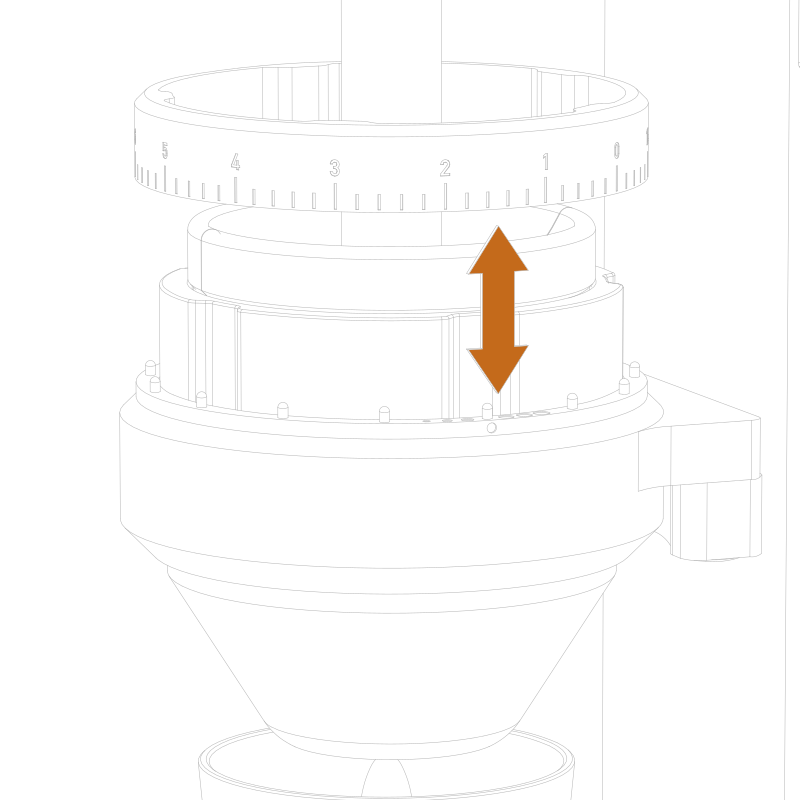
Start by lifting the locking ring until it clears the pins on the Burr Collar. You only need to raise it enough to disengage the pins. There’s no need to remove it.
With the locking ring disengaged, the burr assembly can now rotate freely, allowing you to locate the grinder’s zero point.
03 LESS THAN ZERO
Before dialing in your grind, you’ll need to establish the grinder’s zero point. This is where the burrs just begin to touch, providing a consistent reference for subsequent adjustments.
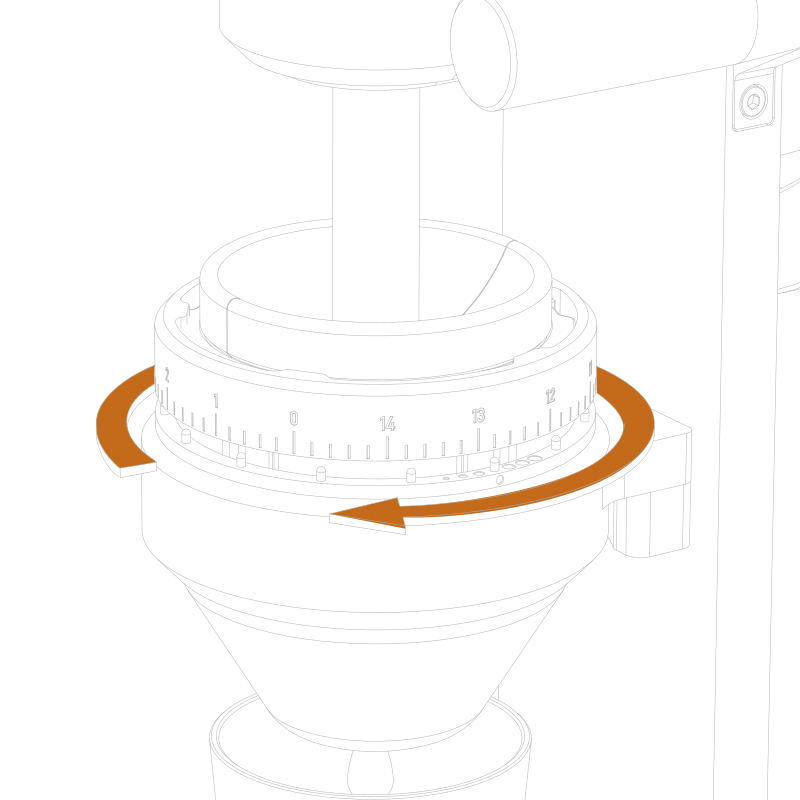
With the locking ring raised, slowly rotate the burr assembly clockwise until you feel the first gentle contact between the burrs. Do not force or tighten beyond this point. You’re looking for the lightest contact, not a firm stop.
This is your zero point. Knowing where zero is makes it easier to dial in different coffees and return to a familiar grind setting.
04 GIVE ME SOME BREATHING ROOM
Now that you’ve found zero, it’s time to give those burrs some space.
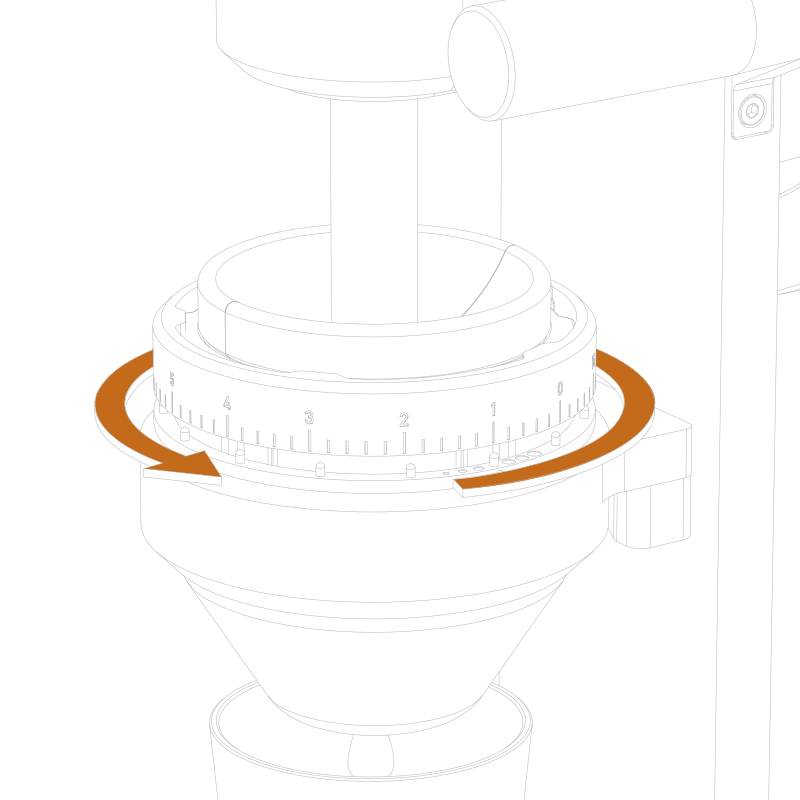
With the locking ring still raised, rotate the burr assembly counterclockwise approximately one full turn (360°).
Turning the burr assembly counterclockwise increases the distance between the two burrs, allowing larger coffee particles to pass between them. The wider the gap, the coarser the grind. Conversely, turning clockwise brings the burrs closer together, producing finer grounds.
One full turn from zero puts you in the general range for espresso grinding. Consider this your starting point rather than your final setting. Different coffees will require some fine-tuning, which we’ll cover shortly.
05 LOCK DOWN
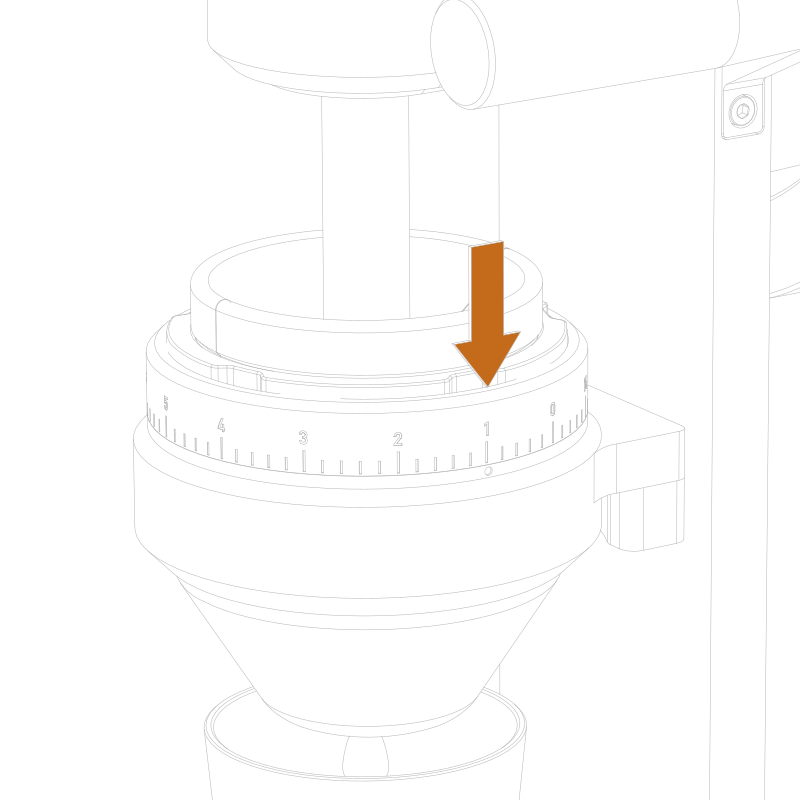
With your initial grind setting established, lower the locking ring until it engages with the pins on the Burr Collar.
Make absolutely sure the locking ring sits flush and is fully seated. The pins prevent the burr assembly from rotating during grinding, keeping your carefully chosen setting where it belongs.
A WORD OF WARNING: Grinding with the locking ring disengaged is a bit like leaving your car window down at the car wash. Things can go wrong rather quickly.
Make a habit of checking the locking ring after every adjustment.
06 BEAN THERE — DONE THAT
With your grind setting established and the locking ring securely in place, it’s time to add some coffee.
We recommend weighing your beans before each grind. A consistent dose eliminates one variable and makes it easier to dial in your espresso. If you’re just getting started, use the same dose each time while experimenting with grind settings.
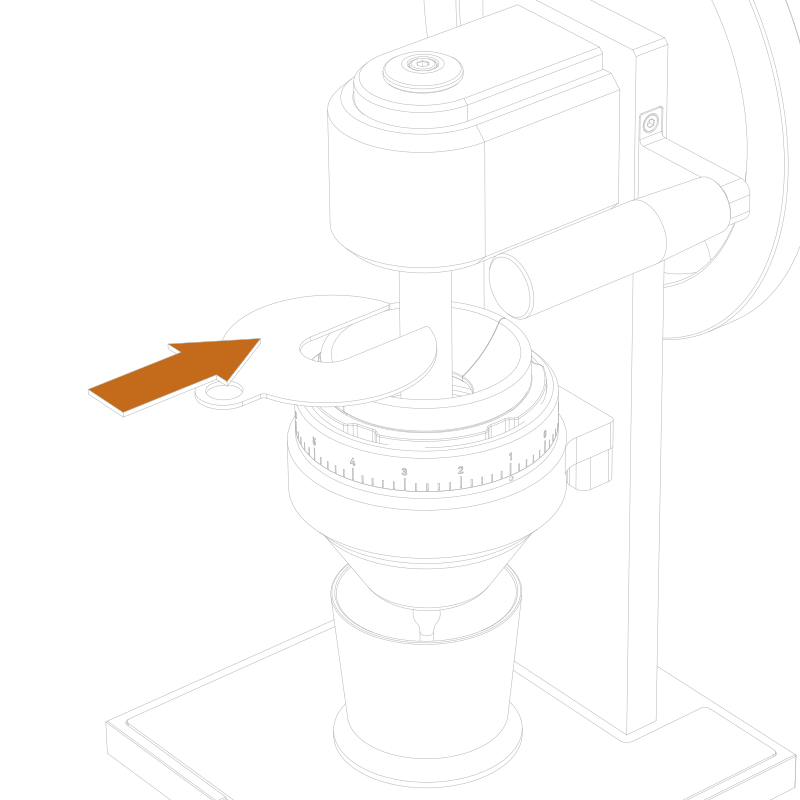
Pour your measured beans into the upper hopper, then slide the hopper cover into place as shown. This keeps any bean fragments contained to the grind chamber while grinding.
You’re almost ready to put that flywheel to work.
07 YOU SPIN ME RIGHT ROUND
You’ve been waiting patiently. Maybe.
It’s time to put that flywheel to work.
Grasp the grab handle (L) with your left hand and the flywheel handle (R) with your right. Turn the flywheel clockwise, as indicated by the arrow.
Start slowly and maintain a smooth, steady rotation. You’ll feel resistance as the burrs begin cutting through the beans. This is perfectly normal.
Keep turning until all the beans have passed through the burrs and the resistance subsides. Your freshly ground coffee will collect in the Espresso Shaker below.
No electricity required. Just a little elbow grease.
08 THE DAILY GRIND
Congratulations. You’ve turned whole beans into freshly ground coffee. Now comes the important part: turning those grounds into a great shot of espresso.
Remove the Espresso Shaker from beneath the grinder. If you’re using the shaker, secure the lid and give it a few gentle shakes to distribute the grounds evenly and break up any clumps.
Position the shaker over your portafilter and release the grounds. If you’re using a Blind Tumbler instead, transfer the grounds into your portafilter and distribute them evenly using a thin stirring tool or WDT needle.
Level the coffee bed, tamp firmly and evenly, and lock the portafilter into your espresso machine.
Now pull your first shot. This is where the fun begins.
09 GRIND ADJUSTMENT BUREAU
Your first shot is your starting point. Don’t expect perfection straight out of the gate. A few small adjustments are usually all it takes to find the right grind.
TOO FAST? If your espresso flows too quickly, your grind is probably too coarse. Turn the Burr Mount clockwise to bring the burrs closer together and produce finer grounds. This increases resistance to the water and slows extraction.
TOO SLOW? If your espresso barely flows or takes too long, your grind may be too fine. Turn the Burr Mount counterclockwise to increase the gap between the burrs. Coarser grounds offer less resistance, allowing water to flow more freely.
UNEVEN EXTRACTION? If your espresso sprays, sputters, or flows unevenly, you may be experiencing channeling. Water is finding an easier path through the coffee bed rather than extracting evenly. Before changing your grind setting, check your distribution and tamping technique.
SMALL ADJUSTMENTS MATTER. The HG-1 Prime offers precise grind adjustment. Start with small changes rather than large turns of the Burr Mount. Even a slight adjustment can noticeably affect your shot.
REMEMBER: Lift the locking ring before making adjustments and fully reseat it afterward. Keep your coffee dose consistent and change only one variable at a time. Otherwise, you’ll never know which adjustment made the difference.
Dialing in espresso takes a little patience. Fortunately, the results are worth the grind.
10 MAKE YOUR MARK
Now that you’ve dialed in your espresso, you may have noticed that the numbers on the locking ring don’t necessarily line up with a convenient reference point. Here’s how to change that without disturbing your carefully chosen grind setting.
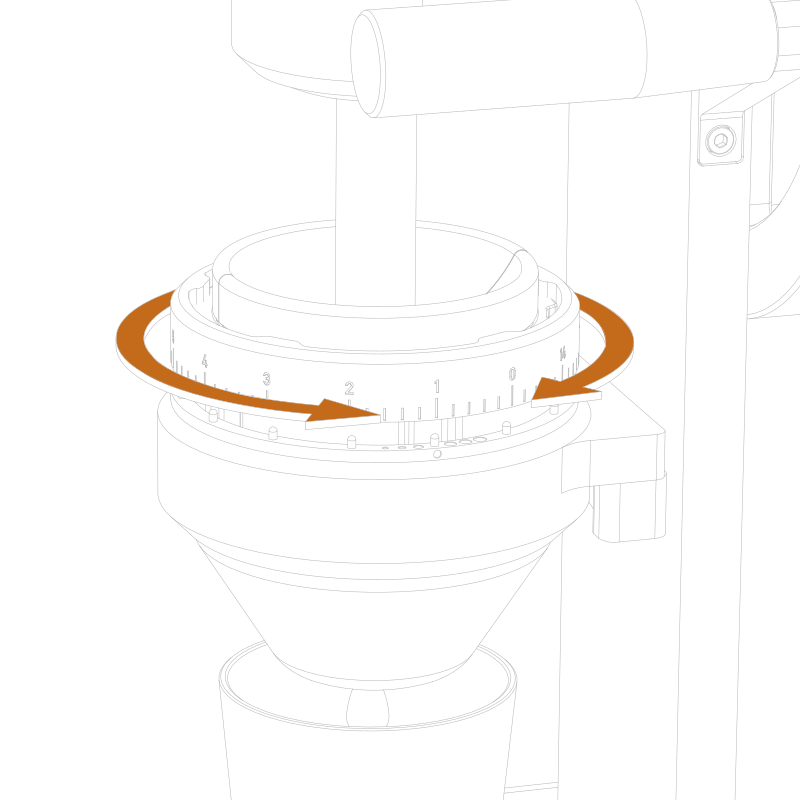
The numbered locking ring can be repositioned so its markings correspond to your preferred grind setting.
Lift the locking ring completely clear of the pins on the Burr Collar. Without rotating the Burr Mount or changing your grind setting, turn the locking ring independently until your preferred reference mark aligns with the indicator.
Lower the locking ring back into position, making sure it engages fully with the pins and sits flush.
This allows you to establish a convenient reference for your grind settings without disturbing the burr adjustment itself. It’s particularly useful when switching between different coffees or returning to a previously dialed-in setting.
REMEMBER: The numbers are reference markings, not absolute grind settings. What matters is finding the setting that works for your coffee and being able to return to it.
11 THE ART OF THE GRIND
There’s a learning curve. You’ll need to develop a feel for the grinder, find your preferred technique, and occasionally accept that your first attempt wasn’t quite what you had in mind. But with a little patience, what initially requires concentration soon becomes second nature.
A few parting suggestions: maintain a smooth, steady grinding rhythm, apply gentle downward pressure on the grab handle to keep the grinder stable, and pay attention to the resistance you feel through the flywheel. If you’re grinding regularly, we recommend securing the grinder to your work surface.
The reward isn’t simply a good espresso. It’s the satisfaction of understanding your equipment, developing your technique, and having a direct hand in the result.
And when you’ve finally pulled that perfect shot, feel free to call your friends, photograph your grinder, and congratulate yourself on your considerable talents.
If things didn’t go quite as planned, there’s always the next shot.
Enjoy the process. That’s part of the pleasure.