HG-1 Instructions
This is your step by step guide for grinding your first shot with the HG-1 grinder.
Please read all directions before use. This specifically applies to men who disdain road maps, recipes, Ikea instructions, and software manuals.
The HG-1 is a single dose grinder. In order to get the best results, we recommend measuring a specific volume or a uniform weight of coffee beans each and every time you grind. Reducing the number of variables is a surefire way of improving the consistency of your shots.
Please bear in mind that grinding beans for espresso isn’t an exact science and it will take a modicum of trial and error to properly dial in the grinder.
Location, location, location
Find a good place for your grinder.
Place the grinder on a flat, clean, stable surface. The HG-1 weighs close to 27lbs and stands over 17″ tall. Modern kitchen standards recommend an 18″ distance from the top surface of the counter top, to the bottom of the upper cabinets. Whether this standard has been followed, varies based on the age of your home. Please check your cabinet height before ordering.
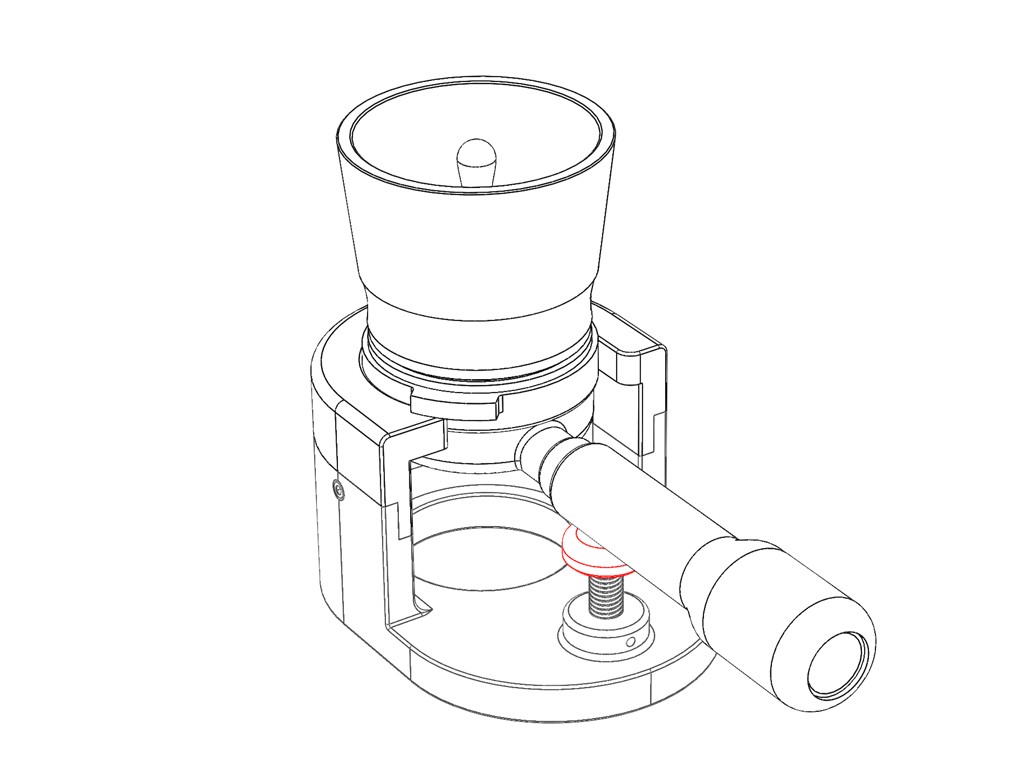
Be sure you have enough space to operate the grinder. You’re going to need room to spin the flywheel. Give yourself at least 6″ of vertical clearance above the flywheel handle. Orient the grinder so the flywheel handle can be grasped in your right hand and the grab handle in your left.

A Clean Sweep
OPTIONAL – if you live in a very arid or static prone location, consider attaching the static wiper that is included with the grinder. The static wiper is attached directly to the bottom of the inner burr and will require you to remove the lower axle capfrom the machine before installation.
Do NOT attempt to attach the static wiper while the grinder is upright. The inner burr could slide off the main shaft and damage the grinder.
With the machine still resting on its side and using the 5mm hex key included with the grinder, remove the screw holding the lower axle cap to the inner burr.
Stabilize the grinder by holding the flywheel securely. Remove the axle cap and store for safekeeping. Re-use screw and thread though washer and wiper, then tighten.
Read our webpage for more information on countering static.
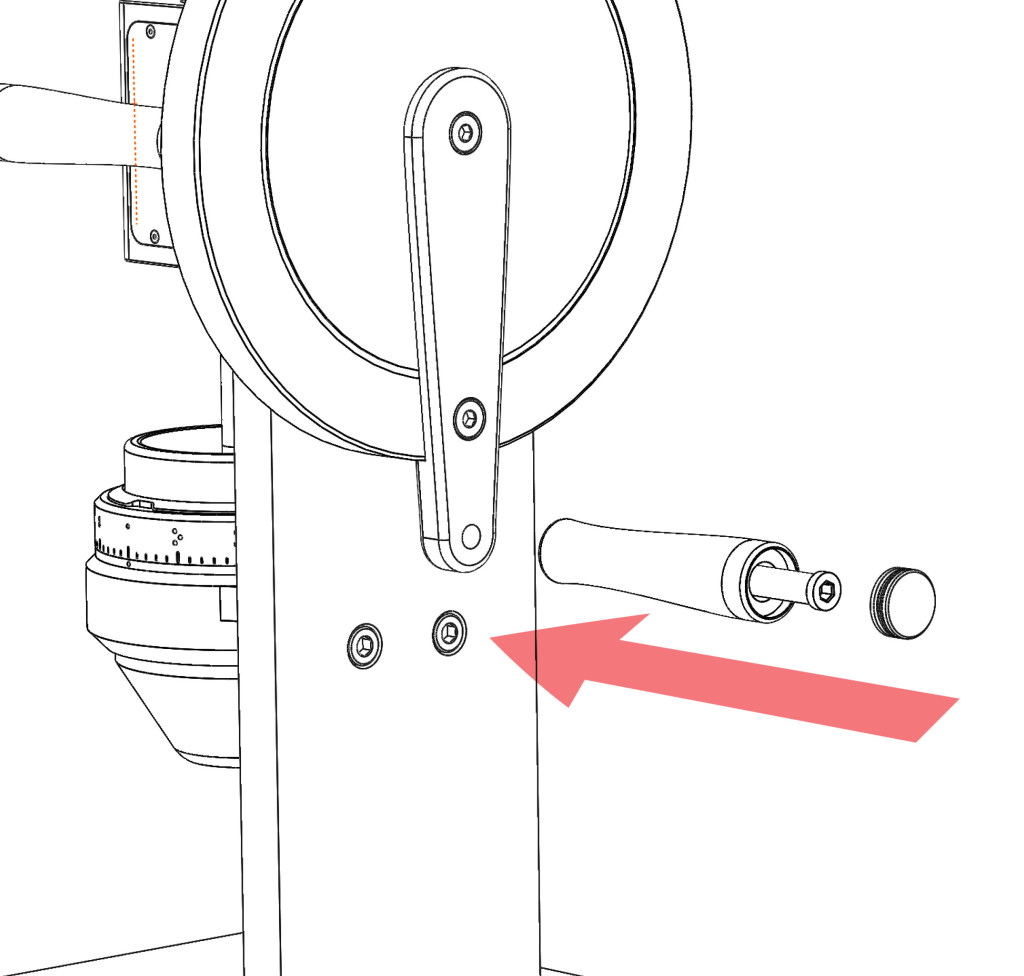
Get a hold of yourself
Return the grinder to an upright position.
Use the included 5mm metric hex key to screw the shaft to the flywheel lever. Tighten securely.
Once complete, insert the cap into the end of the flywheel handle.
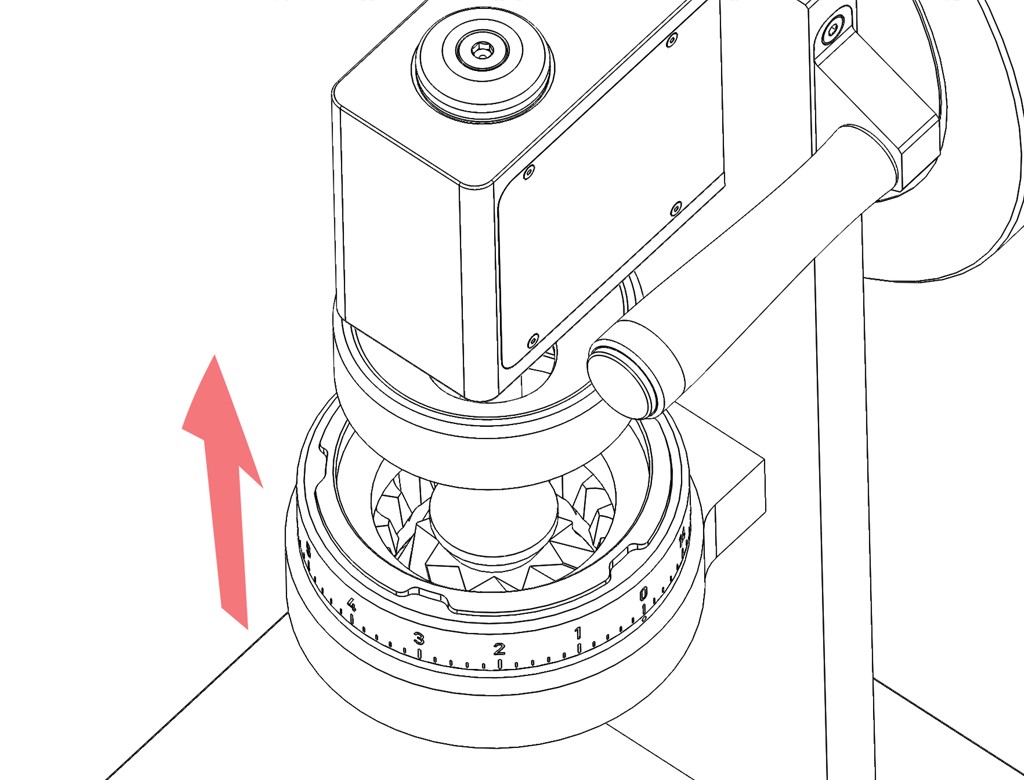
Pop the Hood
Continue your walk around and examine the upper burrs.
Lift the upper funnel to expose the upper burr assembly. Check to see if any foreign material has become lodged inside the burrs during transit. DO NOT USE YOUR FINGERS TO REMOVE ANY DEBRIS. The flywheel can turn unexpectedly and can cause injury. Use pliers or tweezers to remove foreign objects.
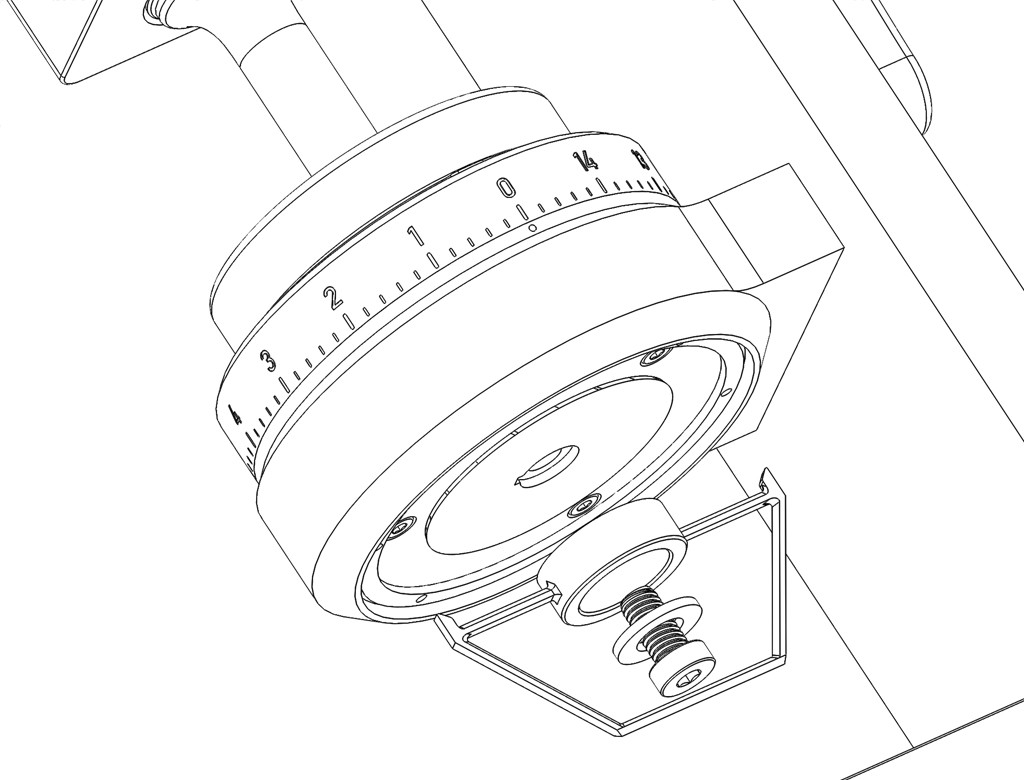
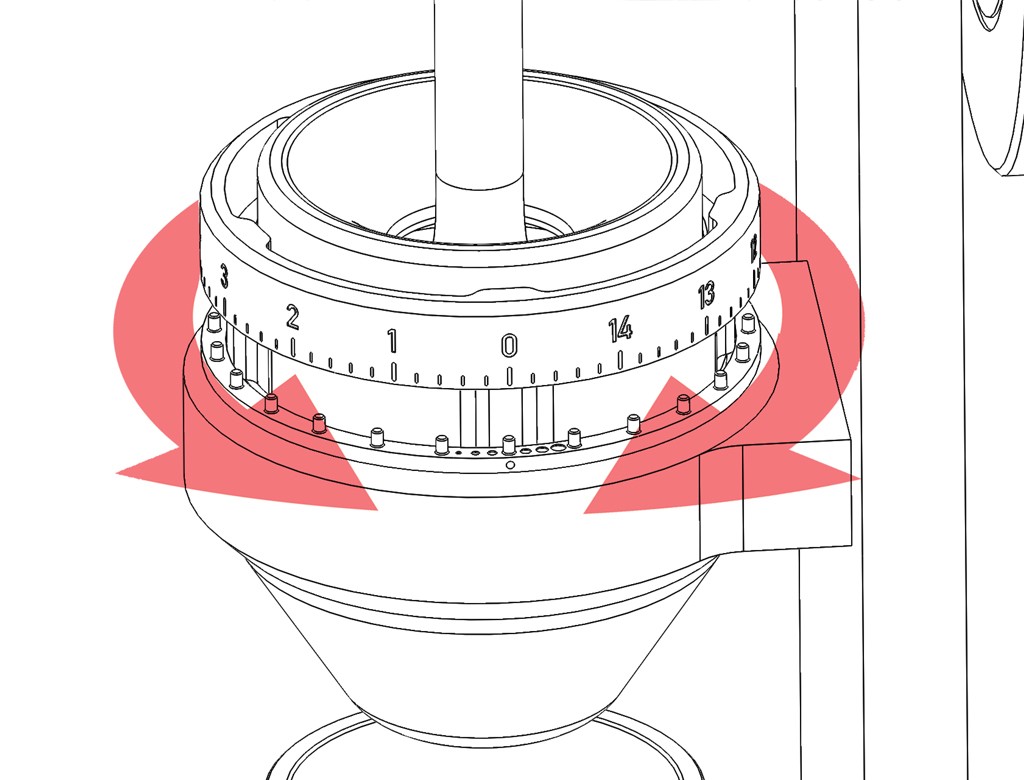
Less than Zero
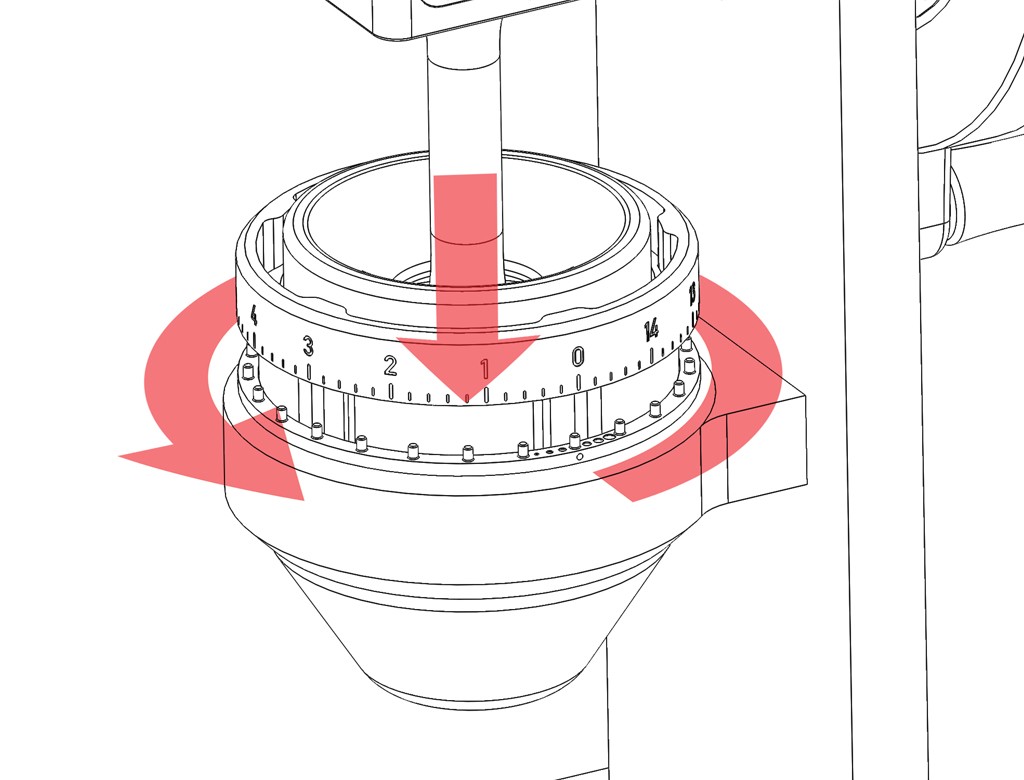
Set the grinder to the zero point.
Lift the locking ring until it just clears the pins on the burr collar. While holding the locking ring, rotate the burr mountclockwise until the burrs softly touch. This is the zero point of the grinder.
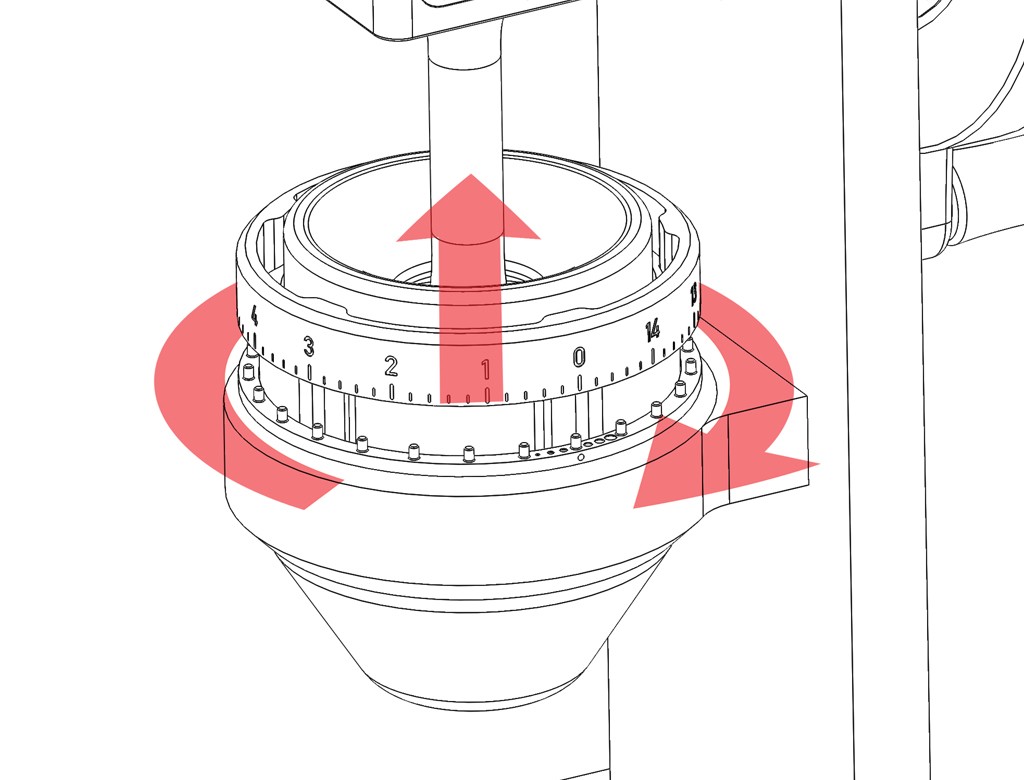
Dialing it In
From the zero point, rotate the burr mount approximately 1.25 rotations or 450°. Lower the locking ring onto the pins on the burr collar. Make sure that the bottom of the locking ring is flush with the surface of the top of the burr collar. The burrs are now in the espresso range and you’re now ready to begin dialing in the grinder.
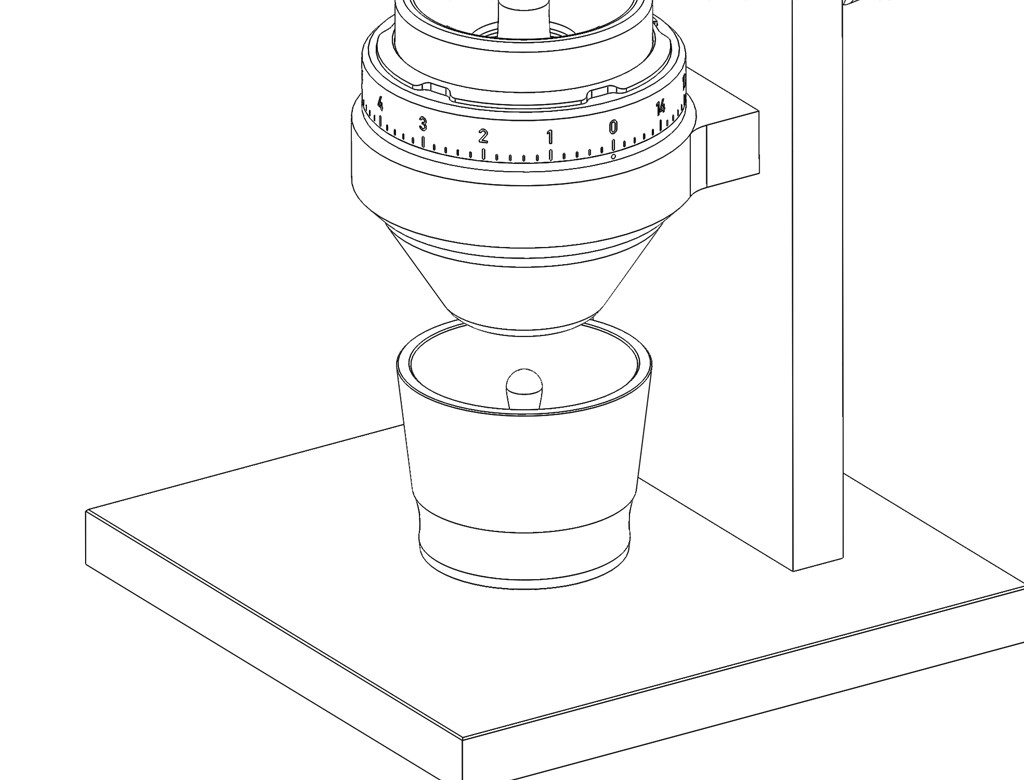
Blind Tumbler
Place the blind tumbler directly beneath the lower funnel. Make sure that the tumbler plug is inside the tumbler.
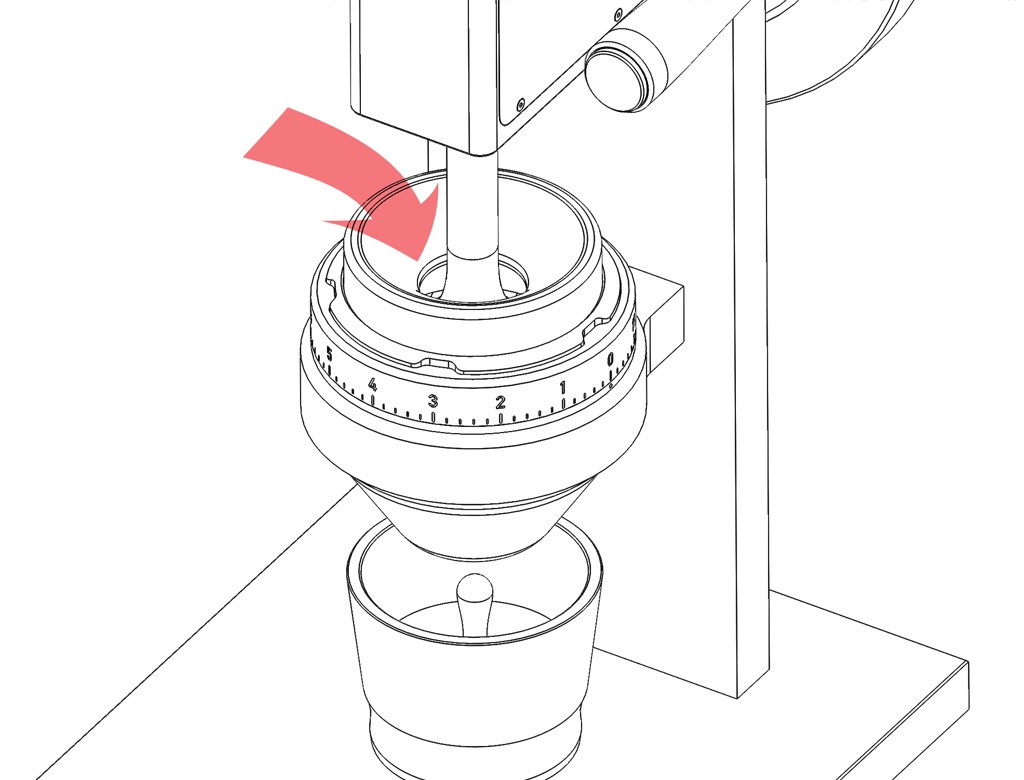
Load ’em on Up
Pour a measured dose of beans into the upper funnel. The beans will fall into the grinding chamber as you operate the grinder. Do NOT place your fingers, or anything else, into the grinder while you’re operating the machine.
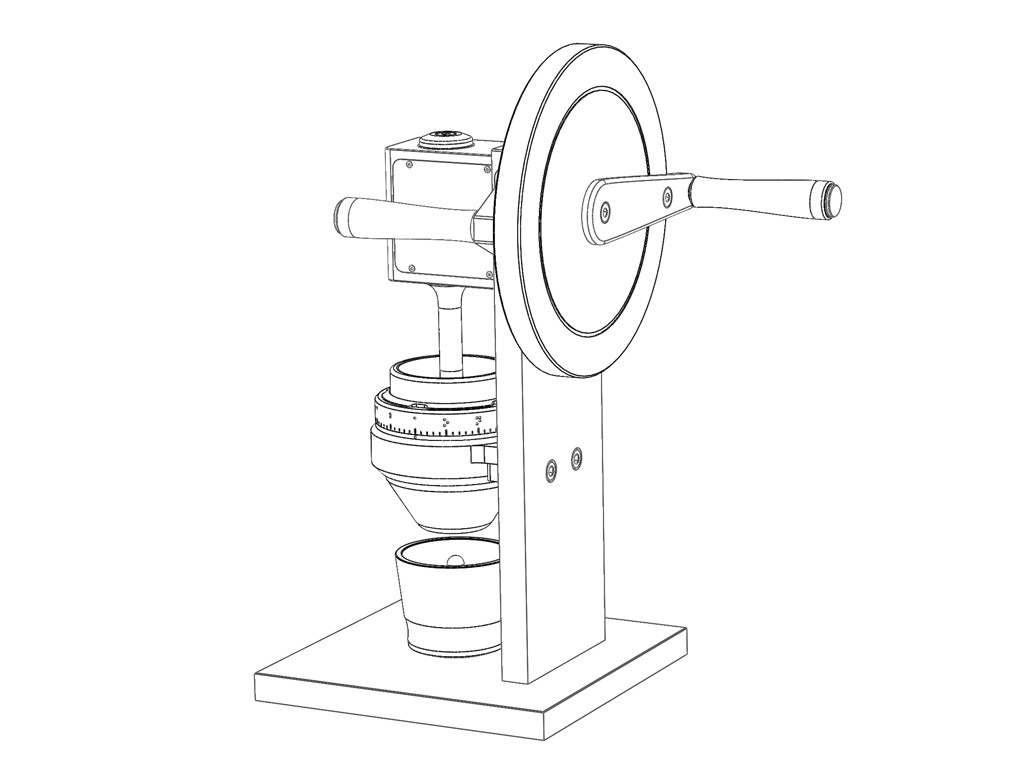
Tick Tock 3 o’clock
With your right hand on the flywheel handle, rotate the wheel counterclockwise and come to rest at 3 o’clock. This is the optimum start position, giving you the best leverage and balance to begin grinding.
Adjust the Grind
Based on how your first shot went, you will have to either make the grinds finer or coarser.
The HG one grinder uses a micro stepped approach for changing grind settings. By lifting the locking ring and rotating the mount clockwise or counterclockwise, the assembly moves up or down. As the assembly moves, it increases or decreases the distance between the inner and outer burrs. Clockwise turns give you a finer grind, and counter clockwise a coarser one.
Each mark on the locking ring, indicates a vertical travel of the burr sets of only 1/75 or 0.013 mm.
A laser etched guide displaying coarse or fine rotational directions is visible on the top surface of the burr collar and is visible when the locking ring is lifted.
Distribute and Redistribute
We highly recommend you do not skip this step!
Take the blind tumbler and place it on top of your portatfilter. Give the grounds a quick stir with a chopstick or whisk. You must re-distribute the grounds for optimum results. Pull the plug and let the grounds settle into the portafilter. Pictured below is the optional portafilter cradle we offer as a separate accessory.
Level, tamp and pull.
Call your friends to let them know how great you are, take some pictures of your new grinder to post on Facebook, or sulk in the corner before trying again.
Adjust the Grind
Based on how your first shot went, you will have to either make the grinds finer or coarser.
The HG one grinder uses a micro stepped approach for changing grind settings. By lifting the locking ring and rotating the mount clockwise or counterclockwise, the assembly moves up or down. As the assembly moves, it increases or decreases the distance between the inner and outer burrs. Clockwise turns give you a finer grind, and counter clockwise a coarser one.
Each mark on the locking ring, indicates a vertical travel of the burr sets of only 1/75 or 0.013 mm.
A laser etched guide displaying coarse or fine rotational directions is visible on the top surface of the burr collar and is visible when the locking ring is lifted.
Making your Mark
Once you feel that you’ve dialed in your grinder, it’s time to make your mark.
Lift the locking ring completely off of the burr mount and it clears the vertical grooves. Rotate the ring till the desired marks are visible, then lower the locking ring back into place.

Techniques
The first few times you use the grinder you might feel it hop. This is because you’re not applying enough downwards pressure on the grab handle. As you feel the grinder about to move, press downward slightly. After a while you’ll sense a certain rhythm to when you need to apply pressure. As with any hand tool, you need to pay attention to the task at hand.
Another issue is stalling the grinder. The key is using a very steady pace when turning the flywheel. Don’t try to spin the wheel as fast as you can, instead try to set a consistent pace. Concentrate on the amount of resistance you’re feeling and then increase the amount of force when you start to feel the grinder is about to stall. Once again, by concentrating on the process you’ll be able to turn the flywheel without dropping a beat.
The usual warnings:
We love our children so please do not let them operate the grinder. For adults the flywheel is fun to play with and it’s even more tempting for small ones. The grinder is very heavy and if it falls on someone, it will hurt. The grinder also contains very sharp blades that can cause serious harm if little fingers find their way inside the machine.
Do not place anything else apart from coffee beans in the grinder, you’ll break the grinder or worse shrapnel might fly out. Do not put your fingers in the grinder while it’s moving or not moving, the flywheel can turn unexpectedly.
Do use a brush and not your fingers to clean the inside of the grinder. Did we mention those blades are sharp?
Most importantly please use common sense. Don’t try to attach the grinder to a motor–outboard, lawnmower, electric or otherwise.